Wednesday, November 17, 2010

How do you display the Christmas Cards that you receive?

Phew!  I finally got a day off from work.  This has been a very looong week. 

With what little time I had left before bed, I used to search the net for different ways to display Christmas cards.  Every year, we do the same thing.  We’ll drape the doorway with garland and hang the cards from the garland.  This year, I want something different.  Well, my search didn’t find me much, but I did think that this idea was cute:

cards-door-de

Source:  Country Living Magazine


How do you display your Christmas cards? 


And you know how it goes when you’re searching the net for something in particular.  You’ll come up on something else that you’ll add to your project list. (or is it just me and my ADHD?)   Like this:


Pinecone-Tree-Decoration-GTL1206-de 

Source:  Country Living Magazine


And this:

 spraypainted

Source:  Real Simple  (Now wouldn’t that pine cone tree look pretty painted white like this wreath with some glittery “snow” sprinkled on it?)


So, now, not only am I looking for ways to display my cards, but I also need to find a million pine cones. 


And I’ve also been digging through the kids’ baby pictures because I’ve been wanting to try and make something similar to these:

pbovalornament

Source:  Pottery Barn


OK…back to the original topic…How do you display all of those Christmas cards that you receive?  I would love to see some clever ideas! 

Thursday, November 11, 2010

MORE DIY CHRISTMAS ORNAMENTS:


Music sheet this, music sheet that…everywhere you turn in blogland, there’s music sheets.  If you’re tired of music sheet crafts, you might want to skip this post…lol…

Have you seen the latest Pottery Barn Catalog yet?  I LOVE LOVE LOVE their “Songbird Tree”.  It’s so pretty and romantic!  I love the glittery music notes, the glittery oval photo frames, the “Happy Holidays” garland, the little bitty birdcages.  I loved it so much that I ordered everything on that tree.  Yeah right!  I wish I could…lol…  But it did inspire me to make some new ornaments for our Christmas tree, with a “musical theme” of course.  I am nowhere near finished,  but I couldn’t wait to share them with you all. 

I tried to get a picture of the music note ornaments separately but they kept showing up gold for some reason. 

Here’s how I made those:  I printed out some music notes from MS Word.  Transferred them to cardboard.  Cut them out.  Glued and glittered both sides.  I still need to add the ribbon holders.  These are not as sturdy as Pottery Barns I’m sure, but after gluing and glittering both sides, it does get quite stiff.  I think these would also be cute with some aged sheet music mod podged on them instead of the glitter.  I may have to try that and see how they turn out. 

groupshot


Well, ok, not all of it’s music themed.  This is a tissue paper flower that I made by cutting up an old sewing pattern.  I added a big rounded button to the center.  I’m sure you remember how to make these from kindergarten.  We used to make them from toilet paper when I was little.

paper flower

I’m not sure if tissue paper would be safe on a lit tree or not, (would they?)  but I thought that I would make a bunch of these and use them on top of gifts.  Or maybe make a big bouquet of them and add some really pretty ribbon and use it as a topper.  OOOH…I think that would be really pretty.


For the music scrolls, I went to MS word & shrunk some Christmas sheet music that I found HERE to about the size of a pack of cigarettes (do you like how I measure things…lol…).  I was able to fit all four on one page.  I Printed them out on Kraft paper, tore them out & glittered the edges.  While those were drying, I made the scroll part.  I used more Kraft paper cut a little larger than the music, rolled the ends onto wooden skewers, and added round wooden beads to the ends.  I wanted a “layered” look, so I tore some strips of coffee stained paper and glued them on.  When the sheet music parts were dry, I mod podged them on top of the coffee stained paper.  Then I took some craft wire and made the coiled holders.  I love how they turned out but I think I’ll just use twine instead of the wire.  Which would you use?

scrolls


scrolls2

And last but certainly not least…my favorite…the stars:

stars


stars2 groupshot2

I used a tutorial from Ladies Home Journal, but it’s pretty self explanatory.  Cut out the larger star from corrugated cardboard, cut the smaller one from sheet music, add a twine bow and a ribbon hanger (I haven’t got those made yet).  I think these are so stinkin’ cute!  I’m going to try some different shapes as well.  Maybe some hearts, ovals, birdies, etc, etc, etc. 

The best part of all of these ornaments is:  They were all FREE!  I would be willing to bet that every crafter out there has these supplies on hand already.  Can’t beat that!

Well, I guess if I want to get these made before Christmas gets here, I’d better hop off of here and get busy!  Thanks for stopping by and I’ll catch ya later!


This post is being linked up to :
The Shabby Chic Cottage's Transformation Thursday

Somewhat Simple's Strut Your Stuff Party

Hookin' Up With House Of Hepworth's

Beyond the Picket Fence's Under $100 Linky Party

Life As Lori's Get Your Craft On Thursday

Frugal Friday @ The Shabby Nest

Funky Junk Interiors Saturday Nite Special

Saturday, November 6, 2010

Oversized Twig Reindeer


(This is a repost of one of last years Christmas projects.)


Donna over at Funky Junk Interiors hosts a weekly themed link-up party.  This week is sticks/twigs/branches.  After leaving a comment saying that we had an awful wind storm and that I had all kinds of twigs and branches laying in my yard and I needed to find something creative to do with them, I remembered what my hubby and I made last year.  DUH!!  How could I forget about our oversized twig reindeer that we made. 


Inspired by the Oversized twig reindeer from Pottery Barn:

pbdeer2[2]


This is our oversized twig reindeer:

pbinspired[2]


Now, back to what I’ll do with all of the branches in our yard.  This year, I think I’ll make some of the miniature versions to place around the house.  Maybe I could post a little tutorial in a few days on how to make these.

Well, gotta get to work.  Thanks for stopping by and I’ll catch ya later!

Friday, November 5, 2010

Faux Snowballs Tutorial

Looking for quick and inexpensive holiday craft projects?  Here’s one:


Faux Snowballs

101_1584 


Faux Snowballs:

wax paper

gloves

styrofoam balls

joint compound & putty knife

mod podge & glitter


First, lay out your wax paper somewhere for your snowballs to dry.  Roll your styrofoam balls on a hard surface to condense them a little.  Not too hard, we don’t want to squish them.  Now slip your gloves on and smear on the joint compound with your putty knife.  If you get “peaks” that’s ok.  It makes them look a little more realistic I think.  When you have them covered like you like them, sit them on the wax paper to dry.  This will take a while.  When they are completely dry, you can sand down some of the peaks if you’d like.  Next step is the fun part.   Brush on a coat of mod podge and then sprinkle with glitter.  And you’re all done!


These would make cute little ornaments if you had the smaller styrofoam balls. 


Here’s a couple more pics of the ones I made:

sballs

sballs2


I’m linking this project up to Funky Junk's Saturday Night Special

Thanks for stopping by…and I hope you’ll try these!

Thursday, November 4, 2010

An Amazing Before and After


Well, an amazing “cleaning” before and after…lol… 

Just wanted to take a little break to share this with you:

Today my mom asked me if I’d be interested in a tea server set? (I guess that’s what you call it) that a friend had just given her.  She said she just didn’t have anywhere to put it and thought I might would like to have it to set out in my dining room.  Normally, I’d tell her no, because I just have too much stuff laying around as it is, but something told me to say yes this time.  I told her to bring it on down and I’d check it out.   Even as tarnished as it was, I thought it was very pretty.  After reading the partial sticker on the bottom that said “Solid Bra”  I kind of figured it meant solid brass…lol.  So after searching the internet to find out how to clean brass, I tried 3 things:  Worcestershire sauce, tobasco sauce, and ketchup.  Out of the 3, the Worcestershire sauce worked the best. 


This picture shows best how tarnished all of the pieces were:


101_1563


101_1555


101_1553


And even though I’m not finished yet, I wanted to show you some afters:

101_1544

101_1566

101_1569

I doubt that it’s an antique or anything, but Isn’t it pretty?  Look at that design on there!  I can’t wait to get it all finished!  Ok, break is over…must get off of here and finish up.

Catch ya later!

Tuesday, October 19, 2010

Wanna’ See My Porch Witch?


Remember in a previous post I mentioned that I would love to try to make one of those witches using a styrofoam wig head and paper mache?  Well, she’s just about finished!  I just need to fluff up her legs a little and attach her pants legs to the boots somehow. 


porchwitch2


porchwitch3


porchwitch1


Materials used:

  • styrofoam wig head (Sally Beauty Supply)
  • pvc pipe frame for upper body and arms
  • old thrift store red sundress
  • black headpiece is from an old black slip
  • black fabric I already had
  • pair of thrift store black pants
  • old pair of black boots
  • lots and lots of newspaper for stuffing
  • hands are made from your everyday household latex gloves from the Dollar store.  2/$1  Turned them inside out and painted them with acryllic paints, stuffed them and duck taped them to pvc pipe arms.
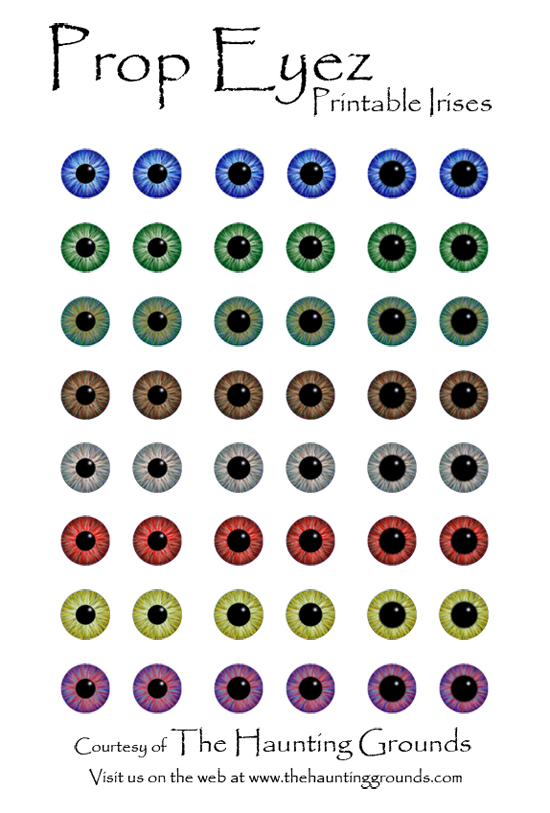
  • eyeballs are made from polymer clay with printed irises modpodged on.  printed irises come from The Haunting Grounds
  • just a few clumps of hair from an old wig. 
  • I paper mache’d using newspaper strips, paper towels, and cotton balls. 

LESSON LEARNED:  Paper mache is not just for kids…This was so much fun to create!   


She went from this:

wighead


to this:


porchwitch3


What do ya think?  Isn’t she cute in a creepy sort of way?


(I think I’d better finish her up and get her outside quickly!!  The dogs are growling and barking and ready to attack her! lol…) 


This post is being linked up to :

Metamorphosis Moday at Between Naps on the Porch  Head on over there to see some great Before & afters!

Creations By Kara...Look What I made

Someday Crafts Whatever Goes Wednesday

The Shabby Chic Cottage's Transformation Thursday

Funky Junk Interiors Saturday Night Special

Wednesday, October 6, 2010

My Dollar Tree Halloween Decorations


I finally purchased a few Halloween decorations from the dollar tree.  And when I combined them with things I already had around the house, I created these:

First up we have my hand and fingers collection.  They belonged to trick or treaters from last year.  What were they thinking trying to steal my candy!

101_1429

(hand and spiders were from the dollar tree…fingers from halloween express)


Next up is hubby #3.  I told him to straighten up or I’d have to take drastic measures.  He just wouldn’t listen. (skeleton from dollar tree.  I just tore him apart and threw him in a large dollar tree vase and added some moss) 

101_1438


(mice & moss from dollar tree)

101_1440

A bat that was captured 50 years ago in Transylvania.  (bat from dollar tree…glowing water made using a highlighter marker.  It’s supposed to glow when lit by a blacklight.  All I had was a candle. Will try to get a blacklight this weekend and see how it works.)

101_1443


black widow spider and her web also captured in Transylvania 50 years ago and preserved in the same glowing water. 

 101_1448


and here it is all laid out on my side table in the dining room.

101_1446 


Hopefully I will get a few more things made this weekend.  I am definitely wanting to try that witch that I posted about in my last post. 


This post is being linked to:  Funky Junk Interiors SNS

Technorati Tags: ,
Related Posts Plugin for WordPress, Blogger...