Showing posts with label DIY CRAFTS. Show all posts

Monday, December 6, 2010

More Angel Ornaments


In an earlier post, I mentioned that I was going to make some of my coworkers some of those wire angel ornaments.  Well, that’s what has been keeping me busy lately.  Here are 8 more angels ready for a new home:


angel2

Each one different:

angel3


angel4


angel5


angel6


I love this one:

angel7


But I would have to say that this next one is my favorite.  The Swarvorski crystals just sparkle:

angel8


angel9


Which one do you like the best?


Linking this post to:

Made By You Mondays at Skip to my Lou

Make It for Mondays at Cottage Instincts

DIY Project Parade at The DIY Show Off

Motivate Me Monday at Keeping it Simple

Get Your Craft On @ Today’s Creative Blog

Boardwalk Bragfest @ Bobbypin’s Boardwalk

Sunday, November 28, 2010

Jingle Bell Swag and a Little Angel Ornament


Finally finished another Pottery Barn Jingle Bell Swag knockoff.  In case you haven’t seen them yet, here’s the one from Pottery Barn:

pbbells[2]


I love these!  If you’d like to make one, HERE'S THE TUTORIAL that I did last year.  And I’m still trying to figure out how to make a stupid bow!  This bow looks “a little” better than the one from last year, but I’m still not happy with it.  I’ve tried one million different tutorials, but if there’s anyone out there with a step by step “bow tutorial for dummies” that’s easy to follow, please give me a holler!  


jbswag


And here’s a little wire angel ornament that I’ve been making for the last few years:


angel  


I will be making a bunch of these this year for Christmas gifts for my co-workers and neighbors. 

Here’s the one I posted about last year:


2009ornament[2]


These are so simple to make.  If you’d like a tutorial for these, just let me know.  I’d be more than happy to provide one.    Well, guess that’s it for now.  Thanks for stopping by and stay tuned because I’m sure I’ll be making something else…lol…

Saturday, November 27, 2010

Even More DIY Ornaments


Are you getting tired of seeing my ornaments yet? 


These are just some miniature glass ornaments that I picked up at the thrift store.  They were too plain on their own, so I jazzed them up in fishnet stockings (not really stockings…it’s the mesh bag that my turkey came in…lol) and then I added some lace and wire.  

jazzedup

jazzedup2

jazzedup3

jazzedup4


More book page ornaments with some bling added to them.  I originally made these to hang in my kitchen window but after throwing them on the tree for their photo shoot, I sort of like them there.

ornie1

ornie2

ornie3


And another recent thrift store purchase:

carols2

Isn’t she pretty?  She stands about 9 1/2 inches tall and winds up to play “Joy To The World”. 


Well, that’s all I’ve got for now.  Hopefully I’ll be able to finish a few more things before Christmas gets here!  Catch ya later!


Linking up to:

Funky Junk Interiors SNS

Thursday, November 11, 2010

MORE DIY CHRISTMAS ORNAMENTS:


Music sheet this, music sheet that…everywhere you turn in blogland, there’s music sheets.  If you’re tired of music sheet crafts, you might want to skip this post…lol…

Have you seen the latest Pottery Barn Catalog yet?  I LOVE LOVE LOVE their “Songbird Tree”.  It’s so pretty and romantic!  I love the glittery music notes, the glittery oval photo frames, the “Happy Holidays” garland, the little bitty birdcages.  I loved it so much that I ordered everything on that tree.  Yeah right!  I wish I could…lol…  But it did inspire me to make some new ornaments for our Christmas tree, with a “musical theme” of course.  I am nowhere near finished,  but I couldn’t wait to share them with you all. 

I tried to get a picture of the music note ornaments separately but they kept showing up gold for some reason. 

Here’s how I made those:  I printed out some music notes from MS Word.  Transferred them to cardboard.  Cut them out.  Glued and glittered both sides.  I still need to add the ribbon holders.  These are not as sturdy as Pottery Barns I’m sure, but after gluing and glittering both sides, it does get quite stiff.  I think these would also be cute with some aged sheet music mod podged on them instead of the glitter.  I may have to try that and see how they turn out. 

groupshot


Well, ok, not all of it’s music themed.  This is a tissue paper flower that I made by cutting up an old sewing pattern.  I added a big rounded button to the center.  I’m sure you remember how to make these from kindergarten.  We used to make them from toilet paper when I was little.

paper flower

I’m not sure if tissue paper would be safe on a lit tree or not, (would they?)  but I thought that I would make a bunch of these and use them on top of gifts.  Or maybe make a big bouquet of them and add some really pretty ribbon and use it as a topper.  OOOH…I think that would be really pretty.


For the music scrolls, I went to MS word & shrunk some Christmas sheet music that I found HERE to about the size of a pack of cigarettes (do you like how I measure things…lol…).  I was able to fit all four on one page.  I Printed them out on Kraft paper, tore them out & glittered the edges.  While those were drying, I made the scroll part.  I used more Kraft paper cut a little larger than the music, rolled the ends onto wooden skewers, and added round wooden beads to the ends.  I wanted a “layered” look, so I tore some strips of coffee stained paper and glued them on.  When the sheet music parts were dry, I mod podged them on top of the coffee stained paper.  Then I took some craft wire and made the coiled holders.  I love how they turned out but I think I’ll just use twine instead of the wire.  Which would you use?

scrolls


scrolls2

And last but certainly not least…my favorite…the stars:

stars


stars2 groupshot2

I used a tutorial from Ladies Home Journal, but it’s pretty self explanatory.  Cut out the larger star from corrugated cardboard, cut the smaller one from sheet music, add a twine bow and a ribbon hanger (I haven’t got those made yet).  I think these are so stinkin’ cute!  I’m going to try some different shapes as well.  Maybe some hearts, ovals, birdies, etc, etc, etc. 

The best part of all of these ornaments is:  They were all FREE!  I would be willing to bet that every crafter out there has these supplies on hand already.  Can’t beat that!

Well, I guess if I want to get these made before Christmas gets here, I’d better hop off of here and get busy!  Thanks for stopping by and I’ll catch ya later!


This post is being linked up to :
The Shabby Chic Cottage's Transformation Thursday

Somewhat Simple's Strut Your Stuff Party

Hookin' Up With House Of Hepworth's

Beyond the Picket Fence's Under $100 Linky Party

Life As Lori's Get Your Craft On Thursday

Frugal Friday @ The Shabby Nest

Funky Junk Interiors Saturday Nite Special

Saturday, November 6, 2010

Oversized Twig Reindeer


(This is a repost of one of last years Christmas projects.)


Donna over at Funky Junk Interiors hosts a weekly themed link-up party.  This week is sticks/twigs/branches.  After leaving a comment saying that we had an awful wind storm and that I had all kinds of twigs and branches laying in my yard and I needed to find something creative to do with them, I remembered what my hubby and I made last year.  DUH!!  How could I forget about our oversized twig reindeer that we made. 


Inspired by the Oversized twig reindeer from Pottery Barn:

pbdeer2[2]


This is our oversized twig reindeer:

pbinspired[2]


Now, back to what I’ll do with all of the branches in our yard.  This year, I think I’ll make some of the miniature versions to place around the house.  Maybe I could post a little tutorial in a few days on how to make these.

Well, gotta get to work.  Thanks for stopping by and I’ll catch ya later!

Friday, November 5, 2010

Faux Snowballs Tutorial

Looking for quick and inexpensive holiday craft projects?  Here’s one:


Faux Snowballs

101_1584 


Faux Snowballs:

wax paper

gloves

styrofoam balls

joint compound & putty knife

mod podge & glitter


First, lay out your wax paper somewhere for your snowballs to dry.  Roll your styrofoam balls on a hard surface to condense them a little.  Not too hard, we don’t want to squish them.  Now slip your gloves on and smear on the joint compound with your putty knife.  If you get “peaks” that’s ok.  It makes them look a little more realistic I think.  When you have them covered like you like them, sit them on the wax paper to dry.  This will take a while.  When they are completely dry, you can sand down some of the peaks if you’d like.  Next step is the fun part.   Brush on a coat of mod podge and then sprinkle with glitter.  And you’re all done!


These would make cute little ornaments if you had the smaller styrofoam balls. 


Here’s a couple more pics of the ones I made:

sballs

sballs2


I’m linking this project up to Funky Junk's Saturday Night Special. 

Thanks for stopping by…and I hope you’ll try these!

Tuesday, October 19, 2010

Wanna’ See My Porch Witch?


Remember in a previous post I mentioned that I would love to try to make one of those witches using a styrofoam wig head and paper mache?  Well, she’s just about finished!  I just need to fluff up her legs a little and attach her pants legs to the boots somehow. 


porchwitch2


porchwitch3


porchwitch1


Materials used:

  • styrofoam wig head (Sally Beauty Supply)
  • pvc pipe frame for upper body and arms
  • old thrift store red sundress
  • black headpiece is from an old black slip
  • black fabric I already had
  • pair of thrift store black pants
  • old pair of black boots
  • lots and lots of newspaper for stuffing
  • hands are made from your everyday household latex gloves from the Dollar store.  2/$1  Turned them inside out and painted them with acryllic paints, stuffed them and duck taped them to pvc pipe arms.
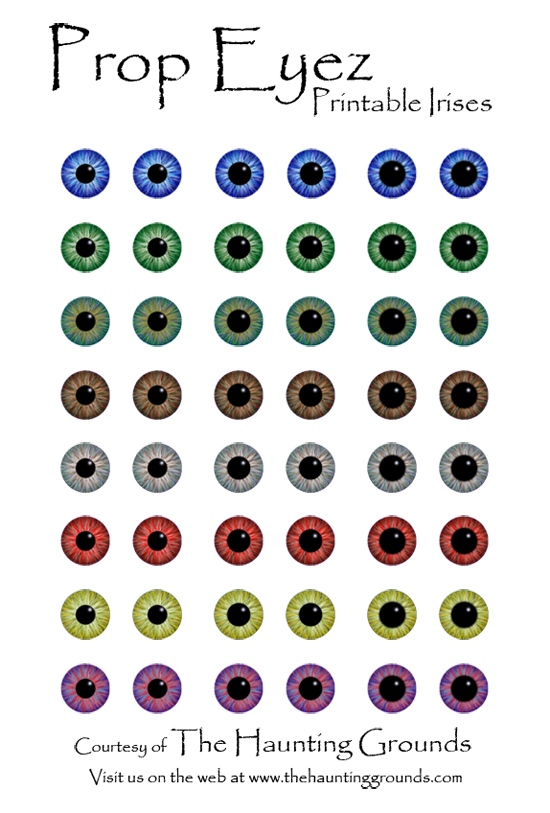
  • eyeballs are made from polymer clay with printed irises modpodged on.  printed irises come from The Haunting Grounds
  • just a few clumps of hair from an old wig. 
  • I paper mache’d using newspaper strips, paper towels, and cotton balls. 

LESSON LEARNED:  Paper mache is not just for kids…This was so much fun to create!   


She went from this:

wighead


to this:


porchwitch3


What do ya think?  Isn’t she cute in a creepy sort of way?


(I think I’d better finish her up and get her outside quickly!!  The dogs are growling and barking and ready to attack her! lol…) 


This post is being linked up to :

Metamorphosis Moday at Between Naps on the Porch  Head on over there to see some great Before & afters!

Creations By Kara...Look What I made

Someday Crafts Whatever Goes Wednesday

The Shabby Chic Cottage's Transformation Thursday

Funky Junk Interiors Saturday Night Special

Tuesday, March 30, 2010

Ballard Inspired Topiary #2…Picture of Spring in my yard…and a future project!


Sorry its been so long since my last post.  We have had a death in the family and some other things come up.  I’m still not feeling up to blogging right now so I’ll keep it short and sweet.

I did manage to finish another Ballard inspired topiary.  Here’s a pic of it: 

topiary

I think I’m finished with these for a while. 

The other project that I mentioned in my last post has been put on hold until I can find what I need to finish it.  (which hopefully won’t be too much longer.)

I also wanted to take a minute and share a couple of pics of our forsythia bushes.   I think these are the prettiest ones in town the county :)

ourforsythia

ourforsythia2

And how about a sneak peek of a “near” future project:

This is what I picked up today at the Salvation Army store for $15.00? 

 dresser


and here’s a couple of pics of what I’d like it to look like when I’m done with it:

Antiqued White 3 Drawer Buffet Sideboard Server

Antiqued White Lighted 3 Drawer China Cabinet Hutch Buffet

Guess that’s all for now.  I will be back, so I hope you’ll come back and see me.

Thursday, March 11, 2010

Ballard Inspired Topiary & Cute Dollar Tree Birds

EDITED TO ADD A LINK TO THE TUTORIAL I USED FOR THIS PROJECT:  TUTORIAL FOUND HERE  THANK YOU ABBY FROM “TALES AND TRIALS” (it took me a while, but I found you again)

In my last post, I mentioned that I was going to try and make some boxwood topiaries like the ones from Ballard.  Well, 2 months later…lol…I finished one.  YAY!!  (not quite 2 months, but it sure felt like it.)   I think it turned out GREAT!  And I did it for about $10.  That’s a double YAY!!  ($8 + tax for 2 bunches of boxwood, $1.00 for the little tin planter.)

I just had to stop by a Dollar Tree to pick up some of those cute little birds you’ve been seeing all over blogland.  I thought they were perfect just the way they were for this little “vignette” so I didn’t do anything to them.  (But I did buy some extras that I have some big plans for…so stay tuned…)

mytopiary

my$treebirds

Well, one topiary down, several more to go!  Do you like?

I am linking this project up to:

The Shabby Chic Cottage's Transformation Thursday

My Romantic Home's Show & Tell Friday

Finding Fabulous' Frugalicious Friday

Funky Junk's SNS

Sunday, February 28, 2010

ANOTHER POTTERY BARN INSPIRED PROJECT


I’M BACK!!  AND FEELING MUCH BETTER!! 

Don’t you just love Pottery Barn?  There are so many things I’d love to buy from there.  But until my rich Uncle in the poor house dies or I get a raise, I’ll just have to keep admiring  those pretty things.  Some of their items can easily be recreated though.  Like these: 

PBEGGS

This picture is from Pottery Barn.  Here are their prices:

  • Cream quail eggs sold in a set of 8. $14
  • Blue robin eggs sold in a set of 12. $14
  • Hurricane vases $19-$59

    OUCH!!  What’s a girl to do when she sees something that she’d love to have but can’t afford?  Why…try to make it yourself of course.


    So, this is what I came up with today:

    quaileggs robineggs3

     robineggs2quaileggs2

    Not as pretty as theirs, but still pretty.

    For the Robin’s eggs, I used: 

    small 1 5/16” wooden Robin’s eggs from Hobby Lobby. They’re sold in a pack of three for $1.19.  I used 2 packs.

    Robin’s egg blue acrylic craft paint ($0.50 at Michael’s)

    and Brown acrylic craft paint also $0.50 from Michaels

    For the Quail? eggs I used:

    paper mache eggs from Michael’s 3/$1

    Vanilla acrylic craft paint ($0.50)

    Brown acrylic craft paint also $0.50.

    For the vase:

    2 candle holder’s $1/each at Goodwill

    1 vase (shopped from the house.  Still need one more…)

    I used Loctite fast setting epoxy $3 something to glue the vase to the candle holder.  I hope that holds!

    Spanish Moss $1 at Dollar Tree

    so for about $10 (with $3.xx for the glue) I made me some pretties for Spring!! 

    What do you think?  

    My next project is this:

    ballarddesigns

    Boxwood topiaries from Ballard Designs. 

    I have never really cared much for topiaries, but these are gorgeous!!  Do you think I can pull it off?  Wish me luck & Stay tuned…


  • Related Posts Plugin for WordPress, Blogger...